This is part three of my Les Paul DIY guitar kit construction log where I'll be reporting on my attempts to turn a lump of repeatedly sanded wood into a nicely stained guitar. It's going to be a story of misery and desperation.
When researching various looks I quickly found that I don't really like
sunbursts. Instead, I decided on an ebony top and mahogany bottom, especially after having stumbled across this
Supreme Electric Guitar Transluscent[sic] Ebony Electric Guitar Mahogany Body Electric Guitar from China on AliExpress that looks awesome. I stained and spray lacquered a piece of junk wood to get an idea of what I was going to achieve.
If you look closely you might notice that the black surface has a slight brownish tint at the lighter parts. In order to accomplish that I added a few drops of mahogany to a slightly diluted black water-based wood stain, both made by
Clou. I shouldn't have. When I started to stain the surface it rather soon became clear that I made a bad mistake. The blended stain seemed to be of a dark violet color. But having started I couldn't just stop but instead had to finish staining the whole body. Sometimes colors change after having dried. Well, it did. The result of my staining efforts was a grayish violet -- very much like blackberry yoghurt left unrefrigerated for two weeks.
There was only one solution, and it rhymed with "sanding". Actually, it
was sanding, and lots of it. I sanded the surface thoroughly hoping not to destroy the veneer. Finally, the surface was light enough that I needn't expect it to show through when I stained it black.
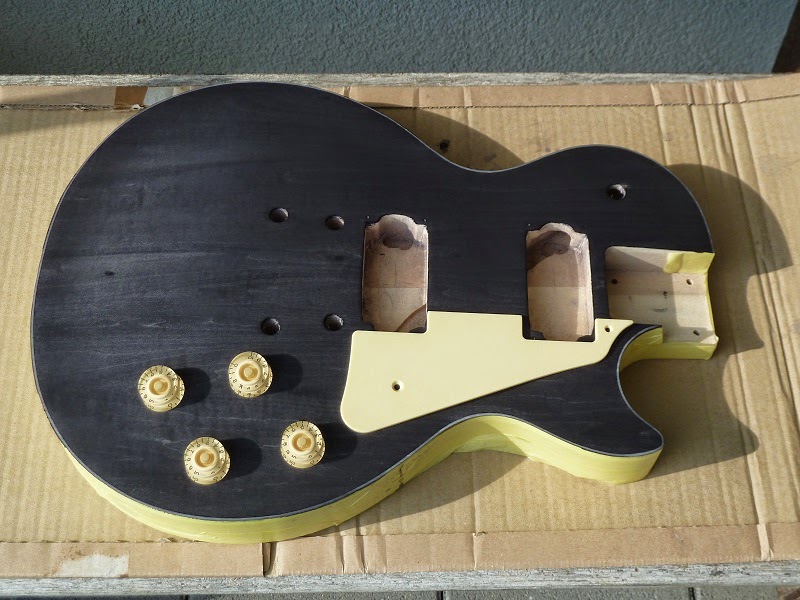
Second attempt. This time I used unmolested (neither diluted nor color blended) black stain, and the result was quite pleasing, particularly with the grain nicely showing. I seriously considered ruining it with a botched sunburst finish after all!
Before proceeding to staining the back of the body I wiped down the surface with a wet sponge in order to lighten it up a bit and also to make the grain stand out a bit more. When I was pleased with the result I tore off the masking tape ... and this was the result: the masking tape ripped off pieces of the edge of the body.
I don't think I have seen anything like this in any of the dozen or so YouTube videos that I've watched before embarking on this project. That is one #@§&% dodgy kit! At this point I considered the project a failure, and I was close to dumping the kit. After some deliberating, though, I decided to simply stop bothering and just finish the kit already.
Alright then. I sanded the edge down to mitigate the damage, and then stained the edge of the guitar, the back and the neck using a water based dark mahogany stain. While the back of the guitar and the neck took the stain quite well, the edge absorbed the color like a sponge, resulting in a very dark edge. This was neither expected nor totally unwelcome. I stained the top of the headstock using the same black stain that I used on the surface of the guitar. The two spots where there were glue drops and hence the stain was not absorbed, I later colored using a black felt tip pen. Not bothering anymore simplifies construction a lot.
After letting the stain dry for a day or two I also wiped the mahogany color down using a wet sponge, lightening up the back and the neck, but not having any effect on the edge. Not bothering anymore
really simplifies construction a lot.
Next installment will be on the finishing using
Tru-Oil gun stock finish. I ordered a 240ml bottle on eBay, and it has already arrived!