It was supposed to be a nice bit of apple sauce to accompany a fine dinner, but then the door bell rang. Well, -- to cut a long, sad tale short -- the charred apple residue was baked into the saucepan and could not be removed with any of those grill and oven cleaning chemicals we had at hand.
I was time for Inaptly Crafted Man!
Warning: Inaptly Crafted Man has super powers. You may not. If you follow this guide, you may damage your cookware beyond repair. You do so at your own risk! Only apply the method on a plain, untreated hardened steel pan. Otherwise, and especially if it's coated with Teflon and the like, you will destroy your pan.
Start with 120 grit sandpaper and rub in a circular motion with moderate pressure, sanding away the charred residue. Yes, sanding! You'll notice that smaller and thinner spots disappear almost instantly. Continue as long as you hear a scratching noise. At the bottom bend (where the flat bottom curves toward the vertical sides) use a finger to hold the sandpaper and rub sideways along the curve. Stop rubbing if the black spots have disappeared. Replace the sandpaper when it is black. Every so often clean out the black sanding dust by rinsing the pan and then drying it using absorbent tissue paper.
When all of the black areas have disappeared and only shadows remain, switch to 240 grit sandpaper and rub some more. Stop if you've had enough, even if some shadows remain.
Finally, use some steel wool, some water and wet rub it clean for a minute or two. Rinse and dry. You will notice that the pan is hardly scratched at all. Poking and meddling with a fork will scratch it far more. All in all, it took less than 10 minutes to completely clean our pan.
Tip: If you've got a soft sanding block (sort of a sponge with sanding material at its sides), use that instead of the sanding paper. It will sand more gently and adjust to the bends more easily.
Friday, 3 June 2016
Wednesday, 1 June 2016
Minimoog Replica

In the next few weeks I'll be reporting about my new project of building a Minimoog Replica. I have already started researching options and ordering some of the rarer parts. I have found various sites on the intertubes of people who have already built their own. Some even offer PCB layouts to copy, print and etch.
Here are the sites that I relied on most.
Clonage du Minimoog by Crazy Patroche
He's published on his site very nice PCB layouts in PDF form that match closely those of a Minimoog. I used these to make Gerber files so I can send them to a PCB manufacturer (I don't etch my own PCBs). Patroche uses the "newer" VCO that contains very rare and very expensive components.
By the way, Patroche gave me permission to post the derived Gerbers on this site, which I'll do as soon as I find they're OK.
Building a Minimoog Model D Replica by Tauntek
This is quite a detailed report on the construction of a Minimoog, electronics, case and all, including some details that I could not find anywhere else. For his replica he used the "older" VCO that uses the CA3046 transistor array. I'm using the same one.
Moog Minimoog (export) by FantasyJack
The essential site with all the schematics and parts list copied from the service manuals. Don't even think of building a Minimoog without consulting it early and often! There are also a few pictures of a disassembled Minimoog, especially boards, that are helpful when tracing a PCB or constructing a Minimoog cabinet.
Minimoog by Arpeggi8
Not quite as detailed as the other sites, but a great inspiration anyway with fine, detailed pictures of the cabinet.
Minimoog Wiki by J R
Quite a detailed build log, essential notes and an indispensable parts list (with substitutions).
Minimoog Resources on YuSynth (Yves Usson's site)
...especially the cabinet dimensions.
Mini-Modules : Minimoog DIY clone on its way by Julien Delgoulet (on MuffWiggler)
This has become quite an extensive post on MuffWiggler, but an essential read nonetheless. Some of the transistor substitutes (see below) were proposed by Julien.
Incidentally, Julien's about to offer a collection of PCBs and a Eurorack frontpanel for his Minimoog clone. But, of course, you can always forego the panel and hide the PCBs inside a nice vintage Minimoog cabinet.
Components
I intend to build my replica as closely as possible (or reasonable) to the original. This means using original components when they are still available, and other parts that look like those on the pictures of the Minimoog PCBs, even if they are a bit more expensive. When in doubt, I follow the pictures.
Transistors
Some of the transistors used in the original Minimoogs are obsolete and cannot be found with reasonable effort and/or expense. They are substituted with similar devices. Here's a table of all transistors used in the schematics, and possible substitutes and sources.
| Device | Substitutes (reference) | Source |
| 2N3392 | still available | Tayda Electronics |
| 2N3415 | 2N3904 (original schematics), 2N3392 (Patroche) | BGmicro |
| 2N4058 | still available | Mouser |
| 2N4303 | BF245 (Julien), 2SK30 (Patroche) | |
| 2N4402 | still available | Small Bear Elec, BGmicro |
| E402 | LS3954A | ebay, Micross |
| MPS-U05 | TIP31C (Patroche) | Tayda Electronics |
| MPS-U55 | TIP32C (Patroche) | Tayda Electronics |
| TIS92 | 2N3904 (parts of orig. schematics) | |
| TIS93 | 2N3906 (parts of orig. schematics) | |
| TIS97 | MPS8097 (Julien) | Mouser |
This table gives a range of possibilities to choose from. When the original schematics offer substitution options, of course, I'll take these. For some of the TIS92/93, substitutes are specified in the schematics, but not for all of them. Still, I think it's safe to substitute them all. For the remainder, I happily rely on the advice and experience of others.
Some of the substitutes have different pin-outs than the original devices. Luckily, the original PCBs have appropriate labeling on the solder side indicating which hole represents which pin. These labels were present in Patroche's PDFs, and hence also converted into my Gerbers. Still, care will be required when stuffing the PCBs.
Also, you need to be aware that some of the transistors need to be matched in pairs. Therefore order a few extras so you'll have enough to select from.
Resistors
In the schematics, 1/4W resistors are specified in some of the units, and 1/2W in the power board. However, in the bill of materials (the ones in the service manual), all carbon film resistors are 1/2W units, as are apparently those in the pictures (size matters sometime...). So I ordered 1/2W ones for all of them. They're cheap anyway, at least on Tayda Electronics. Some rarer values are not stocked there, however, and are much more expensive to order from Mouser or Digikey. But luckily, there's only a few of them.
Capacitors
Most modern circuits used in the DIY community use radial capacitors that use very little real estate on a PCB. This one uses axial instead. There are not that many capacitors, but some of them are quite rare in axial form and hence quite expensive (especially tantalum capacitors).
The filter board uses two 30nF polystyrene capacitors. The biggest value I could find so far was 10nF. That means wiring 3 of them in parallel. Fortunately, there's plenty of space on the boards.
PCBs
I've finished tracing the VCO circuit (that I was unable to find on the intertubes) from a picture of the board -- or rather two of them. Indeed, I had to manually compensate for the lens distortion in order to get right angles, and then arrange the two pictures so that the traces meet where they need to. After a few attempts I got an almost perfect fit, which is why the board came out reasonably well.
To convert the resulting circuit to Gerber files, I exported the graphic as PDF and then used my hand-made PDF-to-Gerber converter program to generate Gerber files (bottom, outline and solder mask only). There were a few issues with the software that I had to fix along the way, but eventually, I got very nice Gerbers of all six circuit boards. Presently (02.Jun 2016), they're off for production at EasyEDA.
8. June 2016
The full set of PCBs has finally arrived! On the picture starting from the top left we have the oscillator, the filter/VCA, then on the second row the small rectifier, the tiny octave buffer, then the dual contour and finally the power/noise board. Some of the components, especially the resistors, have also arrived earlier today, so I could technically start soldering now.

However, there's another shipment arriving later this day (the switches, the card edge connectors and some other items from DigiKey). I think I can just barely hold off until that's arrived, too.
I forgot to mention that I went to the post office today to fetch a package that could not be delivered yesterday. That's the fourth package in a single day, a new personal record! It contains the 15nF polystyrene capacitors that I finally managed to find and buy on ebay. They'll simplify my building the filter board a bit (see Capacitors above).
12.06.2016
I started stuffing the boards with the resistors that I have (that's almost all of them. A few are still in transit from the moon. Futurlec, I'm talking to you!!). Anyway, thanks to the nice layouts by Patroche, all resistors have a common 15mm spacing, which allows bending the legs using a bending gauge utility. Nonetheless, stuffing the boards is a tedious task because (a) the boards don't have silkscreen on top (like the original boards), (b) there are a lot of different values and (c) some of the values given in the replacement lists are wrong (here's Tauntek's errara list) or have been updated as "factory mods". It's a good idea to cross check with images of original stuffed boards once in a while. Working over my original VCO layout that I posted on the Electro-Music forum was a good idea, too, because now that all components align properly, it is quite obvious which holes belong to which resistor.
Meanwhile, I'm finalizing my orders with Mouser (mostly parts that can't be found anywhere else), Musikding (cheaper than Mouser but limited catalog) and Reichelt (whatever remains). I decided to go with the look'n'feel of the earlier boards. These have colorful tropical fish capacitors for certain polyester values instead of the boxy-types of later boards (see Crazy-Patroche for pictures). Some of the boxy-values are expensive or non-stocked at Mouser. Lump-types (as I call them) are always cheaper and more readily available, and while being not as colorful as tropical fishes, at least have a similar lumpy shape. That's good enough for me (and, no, I won't paint them). I'll make a list of component sources once I have them all.
Tip-of-The-Day: When ordering stuff, be sure to double- and triple-check your cart before sending it off. I ordered too few red rocker switches (3 instead of the required 5), which will lead to an expensive follow-up order with shipping cost far exceeding parts cost.
13.06.2016
I've finished soldering those components that I have (resistors, diodes, jumper wires) and made a picture to show off. When soldering resistors, I do the "factory mods" described in the service manuals, which is why some of the values differ from those in the parts lists. I follow the pictures on FantasyJack where you can clearly see that they've got the mods, too (if you know, where to look, that is).
 |
| VCO (top) and Dual Contour boards, partly stuffed |
I do have some of the transistors (2N3392, 2N3904/6) that I need, but I'm unsure whether it's a good idea to solder them now, i.e. before the less delicate components such as the remaining resistors, capacitors etc. are in place.
The friendly people at DigiKey allowed me to amend a pending partial order, so I'll have all rocker switches without an additional follow-up order.
18.06.2016
Oh Futurlec, ye online shoppe,
How hard just can it be,
Whatev'r it is you do to drop
and send those parts to me!
I'm still juggling orders between retailers in order to save shipping costs (big ones like Mouser offer free shipping above a certain minimum amount) and/or moving parts between shopping carts when a certain value is (temporarily) unavailable at a certain retailer. It also seems that certain parts or values are unobtainable with reasonable effort. Here's a (potentially growing) list of parts that I'll have to substitute and hence deviate from the original design.
5M #1 Taper Potentiometer (Glide pot on front panel)
I could not find any reference as to what a #1 taper potentiometer actually is, but Tauntek has measured[PDF] the taper curve, and it seems pretty close to an audio one. Incidentally, on image 9-17 of the service manual -- the wiring diagram -- R2 is specified as 5M audio pot. Unfortunately, those aren't obtainable either (Mouser, DigiKey, eBay). Finally, I've given up searching and will take a 1M audio pot instead. A welcome rationale is given by the friendly people at CAESound:
Glide pot note: We have substituted to the 1 Meg value from the stock 3 meg. We found that this works very well. Our survey says that almost no one ever used the Glide pot set to maximum Glide time. Therefore the Value of 1 Meg will work for 99% of all players.That's good enough for me.
05.07.2016
The order from Futurlec has finally arrived, and I have already started soldering the resistors in place. The VCO that I'm using requires 2 sets of 3 matched resistors, one of 51.1k and one of 15k Ohms. I'm not quite certain as to what degree I have to match them, but I guess when my brand new DMM does not show any difference between them, that's close enough. Unfortunately, I forgot to order enough 15k units, so I don't get a close enough match. I'll add a few more to the Tayda order that's in the queue.
I also checked the 15nF polystyrene capacitors that I found on eBay (see above) and discovered that they are 10% values, when I actually need 2.5% tolerance. I measured the devices using my DMM and found four that are just about within the 2.5% margin, especially when I pair them up to get the required 30nF. I'll take my chances and use them anyway.
Tomorrow, I'm finally going to match transistors. There's just no way around that, if I ever want to finish the synth. I'm going to follow the procedure and use the circuit by Ian Fritz which seems easy enough. Luckily, I still have the circuit somewhere on a breadboard. Also, I have ordered plenty of MPS8097s (TIS97 substitute) and 2N3392s, so I'm confident to find a few matches.
07.07.2016
I've finished matching NPN transistors (MPS8097 and 2N3392) and found enough devices that I can use. Indeed, I bought 30 transistors of type MPS8097 at Mouser and found their VBE to be within +/-2mV of each other with only a few outliers. After setting up a current of 100µA, I was able to match 6 of them pairwise to less than 0.1mV. As for the 2N3392 that I bought at Tayda, I found those that I tested to be all within less than +/-1mV which is a bit suspicious. I didn't expect to find a match after testing 3 devices. They have a different pin layout (ECB), but I checked and re-checked several times. Nonetheless, I'll build Ray "Music From Outer Space" Wilson's transistor matching circuit and check all matches again just to be on the safe side. What remains to do is to find two NPN/PNP pairs, one of them matched to +/-3mV at 20mA, and the other one such that the VBE of the PNP device is 10mV to 20mV lower that that of the NPN at 200mA. I'll try using Ray Wilson's circuit to measure the devices.
07.07.2016
There appears to be a small controversy about the transistors in the VCF ladder, and whether they are matched or not. I thought that they need to be matched but then found that those transistors specifically mentioned in the parts list refer mostly to different ones. Page 2 of the Moog Factory Service Bulletin 804C[jpg] (Synthfool Minimoog Docs), which amends the notes on page 9-9 of the Minimoog Service Manual (the VCF schematics) lists those transistors that need to be matched, but again these are not part of the ladder:
Change note 3 to read:In the schematics, the bottom pair of the ladder (but only the bottom pair) is marked with a small M in a circle, apparently indicating a matched pair (and, indeed, Q29 and Q30 are matched). Also, in some of the pictures I have of the filter PCBs, the ladder transistors are marked with a color dot (see the VCF on Patroche's site), indicating that they are "special" (as in "matched").
Q26 and Q28 are matched to ±3mV Vbe at 20mA IC.
Add note 5:
Transistor pairs: Q5 & Q7, Q13 & Q14, Q15 & Q16, Q27 & Q33 Vbe matched to ±4mV at IC=20mA.
Here's what I'll do: Given that the matching target above is rather generous -- so much so that I think nearly all the transistors I have lie within that range -- I'll use the ones I already did for the ladder and then match 4 more pairs for those listed above in the "add note 5".
What bothers me a little, however, is the requirement for one of the complementary pairs (NPN/PNP) to be matched at a collector current of 200mA. This is pretty much the absolute maximum rating of the 2N3904/6 (substitutes for TIS92/93). The datasheet shows the TIS92/93 to have a higher maximum rating of 800mA, so the required matching current is well within their limit. Perhaps it's sufficient to match the pair at a slightly higher current, say 50mA (one quarter of the maximum rating), to have a pair that's at least partially consistent with the original. Fingers crossed!
20.07.2016
I'm building a variant of the Moog transistor matcher circuit (with a few additions suggested by Ray Wilson). While I believe that most transistors' VBE are well within the limits required for the different circuits, I want to check some of them again. When I redid some measurements to find a few additional matches for the VCF, I found completely different values for the matches that I already had. Perhaps I blew a few transistors when plugging them into the breadboard. I don't know. In any case, I can't trust the matches I have, so I'll do them again but in the traditional way by measuring the VBE directly and then find close pairs.
Electronics Enclosure
I've started planning/building the cabinet of the synth. I bought an (expensive) aluminium sheet in my local DIY store for the front panel. It's only 1.5mm thick instead of the original 0.063" = 1.6mm, but I hope that's not a problem. I sawed it by hand into shape, i.e. 7" x 27 ⅛" (plus 1cm on either side for the bent-down wings). Sawing the long edge was a problem, because my hacksaw does not "reach" far enough into the sheet. I had to saw from either side until the saw frame hit the sheet, and then used a blank sawing blade that I held with gloves to saw the part between. It was ugly but I finally managed to complete the front panel. I'm not quite sure yet how to bend the wings or all the flaps on the side sheets (see pictures of the insides linked above).
I test fitted one of the switches that I bought by cutting a rectangular hole in one of the aluminium cutouts and drilling countersunk holes for the screws. I saw that the specs for the switch were tight, but not that tight.
 |
| How to mount a rocker switch using standoffs (left 1cm, right 9mm). |
 |
| How NOT to mount a rocker switch using standoffs. |
20.08.2016
It's been a while since I updated this build log, but I had a few other projects to tend to. I'm not finished with the PCBs yet, because I still need to match a few transistors (see above ). Also, I had to order a few additional components that I don't like the look or quality of. I found on eBay another couple of 15nF polystyrene capacitors, but they have not arrived yet.
In the meantime, I started with the enclosure (by the way, I'm doing several things in parallel, so this log may at times become a bit messy. Once I'm finished, I'll make a PDF document that will record the whole construction in a more sensible order). I built a bending rig to bend my aluminium sheets (why does autocorrect suggest "aluminum". I'm not mercan...). It worked somewhat well for the two heat sinks for the power supply board, but was totally overwhelmed when I tried to bend the front panel wings: the hinges were bent and torn out. That spells trouble in all caps, when I have to bend the length of the sheets that make up the sides of the electronics enclosure. I'll have to come up with a design different from the original.
While we're at it, I also ruined a plank of wood when I tried to plane it down from 17mm down to 15.9mm ( the metric equivalent of 5/8 inches). At my DIY store I can't get the right thickness, so I'll have to pay a visit a local carpenter.
So many words to report so little progress.
21.06.2017
I've been busy working on a couple of different projects, including a video series on music electronics, but now I'm back. I still haven't decided yet on the metallic enclosure for the synthesizer, so I proceeded with the wooden cabinet in order to get started again. I've finally found a plank of 15mm thickness at my local DIY store and decided that this was close enough to the original (according to the published cabinet dimensions). It will make the synth a bit lighter without making much of a difference visually.

I started by sawing -- by hand -- the two cheeks at the side of the cabinet. By keeping the saw vertical and carefully cutting along the line, I managed to get straight cuts at the proper angles. Because the cuts were done by hand, the cheeks are almost but not completely identical. I hope I can sand them to size. I don't have any decent woodworking tools, and the cheeks showed clearly the limits of what can be done by hand. So I built a jigsaw table that would allow me to do the longer cuts for the remaining cabinet pieces. I'm still making mistakes and ruin lumber galore, but the cuts are certainly straighter and faster to do. So far I've got the cheeks, the back piece with a beveled cut and a glued-on bottom bar, and the trim piece going to the top of the front panel. All the pieces have the occasional scratch and blemish that I'll either be able to sand away or have to attribute to it being a vintage synth, after all.
06.07.2017
I've finally managed to complete matching transistors, so I can finish soldering all the circuit boards. I built a permanent version of both Ian Fritz' simplified transistor matcher and a version of Robert Moogs circuit based on the Dragon Fly Alley adaptation (using a TL071 and an additional capacitor as suggested by Ray Wilson). I re-tested the matched 2N3392 (used in the contour/keyboard board) and found them spot on. I then proceeded to find additional matches for the MPS8097 (TIS97 substitute), so I can use matched transitors for the ladder filter. Nearly all of them lie generously within the requested margins (worst pair is less than 0.2mV apart with 4mV being acceptable).
 |
| Matched transistors ready to be used. A few leftovers in the bag. Coffee hard earned (and well deserved). |
I think regarding how far manufacturing technology has evolved since Robert Moog's times, you can probably just grab a pair of transistors from the same batch and be fine i.e. have an acceptable match. Anyhoo, I'll use what I have and then decide on the electronics enclosure to finally begin the tedious wiring process.
10.07.2017
I'm nearly finished soldering the boards. The only thing that remains is the tempco mod that Yves Usson of yusynth.net describes on his Minimoog page. It consists of moving the three tempco resistors closer to the transistor arrays that they are supposed to control the tracking of. That should take no more than a few minutes. Oh, and I still have to push the ICs into their sockets. That's another five to ten minutes.
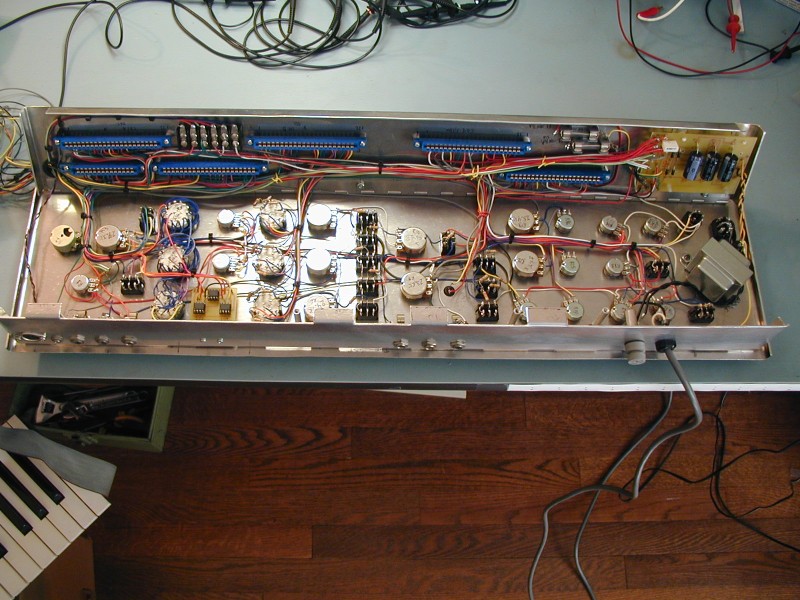
I've also figured out -- finally -- how the electronics enclosure is built in the original Minimoog. By inspecting the interior pictures on fantasyjackpalance.com (and also reading Tauntek's page word by word) I discovered, that the bottom part of the enclosure (where the PCBs are slot into their sockets) is attached to the front panel using a piano hinge, allowing it to "swing" up and down a little, presumably to give access to the card slots and the wiring. The whole enclosure is then attached to the case using another piano hinge. Because there is only one row of mounting holes along the bottom of the front panel, it appears that both hinges are mounted there: one is mounted "inwards" to attach the bottom of the enclosure to the front panel, and the other "outwards" in order to mount the front-panel-plus-enclosure to the wooden frame. The bottom piece of the enclosure therefore needs only one long bend (along the edge opposite the hinge) and two short bends (one on each of the short edges). I should be able to do that -- fingers crossed. After all, Tauntek was too, apparently.
Update
Done! The boards are finally complete. I haven't yet fixed the tempcos to the transistor arrays (note the flying white wires on the VCO board), but I'd call it a milestone anyway.

I may also have found a way to attach the switches to the front panel (see discussion above) by using a narrow brass tube that is narrow enough not to interfere with the switches' operation. But not today. I'll have a beer now, cheers!
14.12.2018
Here are the Gerbers of all of the PCBs seen in the pictures above.
Before you proceed to download, here are the terms and conditions, that you agree to by downloading the Gerber files.
All PCBs except the oscillator board were designed by Crazy Patroche. He kindly gave permission to publish the derived (by me) Gerbers of his original PDF designs. So thanks go to him alone.
The oscillator board (CA3046 version) is my design. I traced it by hand from a pair of pictures. Therefore it looks different (more square and less professional). All blame is mine alone.
I made the Gerbers automagically by converting them from the original PDFs. Based on these, I had the PCBs manufactured at EasyEDA (now JLCPCB). They were accepted, so they seemed to have worked. You may have to alert them, that the strange "grilles" on the oscillator boards are intentional.
The PCBs have no silk screens. You need the original PCB layouts and parts list (especially the assembly scans and parts list further down on the linked page) to complete the build. Cloning a professional instrument is an expert-level project. If you can't be bothered to research and look it up, don't download the files.
- Old Oscillator Circuit Board No. 1
- Contour Generator / Keyboard Circuit Board No. 2
- Power Supply Printed Circuit Board No. 3
- Filter Printed Circuit Board No. 4
- Rectifier Circuit Board No. 5
- Octave Buffer Board No. 6
- Oscillator board artwork. I included it, because there's a violet trace on the right that needs a jumper which is not on the original board (the strange 4-pole pots did that in the original). The image on the first page didn't print properly (not my fault). Just ignore it.
Subscribe to:
Posts (Atom)